Manage P3 Cache
You can manage the PhotonIQ Performance Proxy (P3) cache in the PhotonIQ Performance Proxy dashboard.
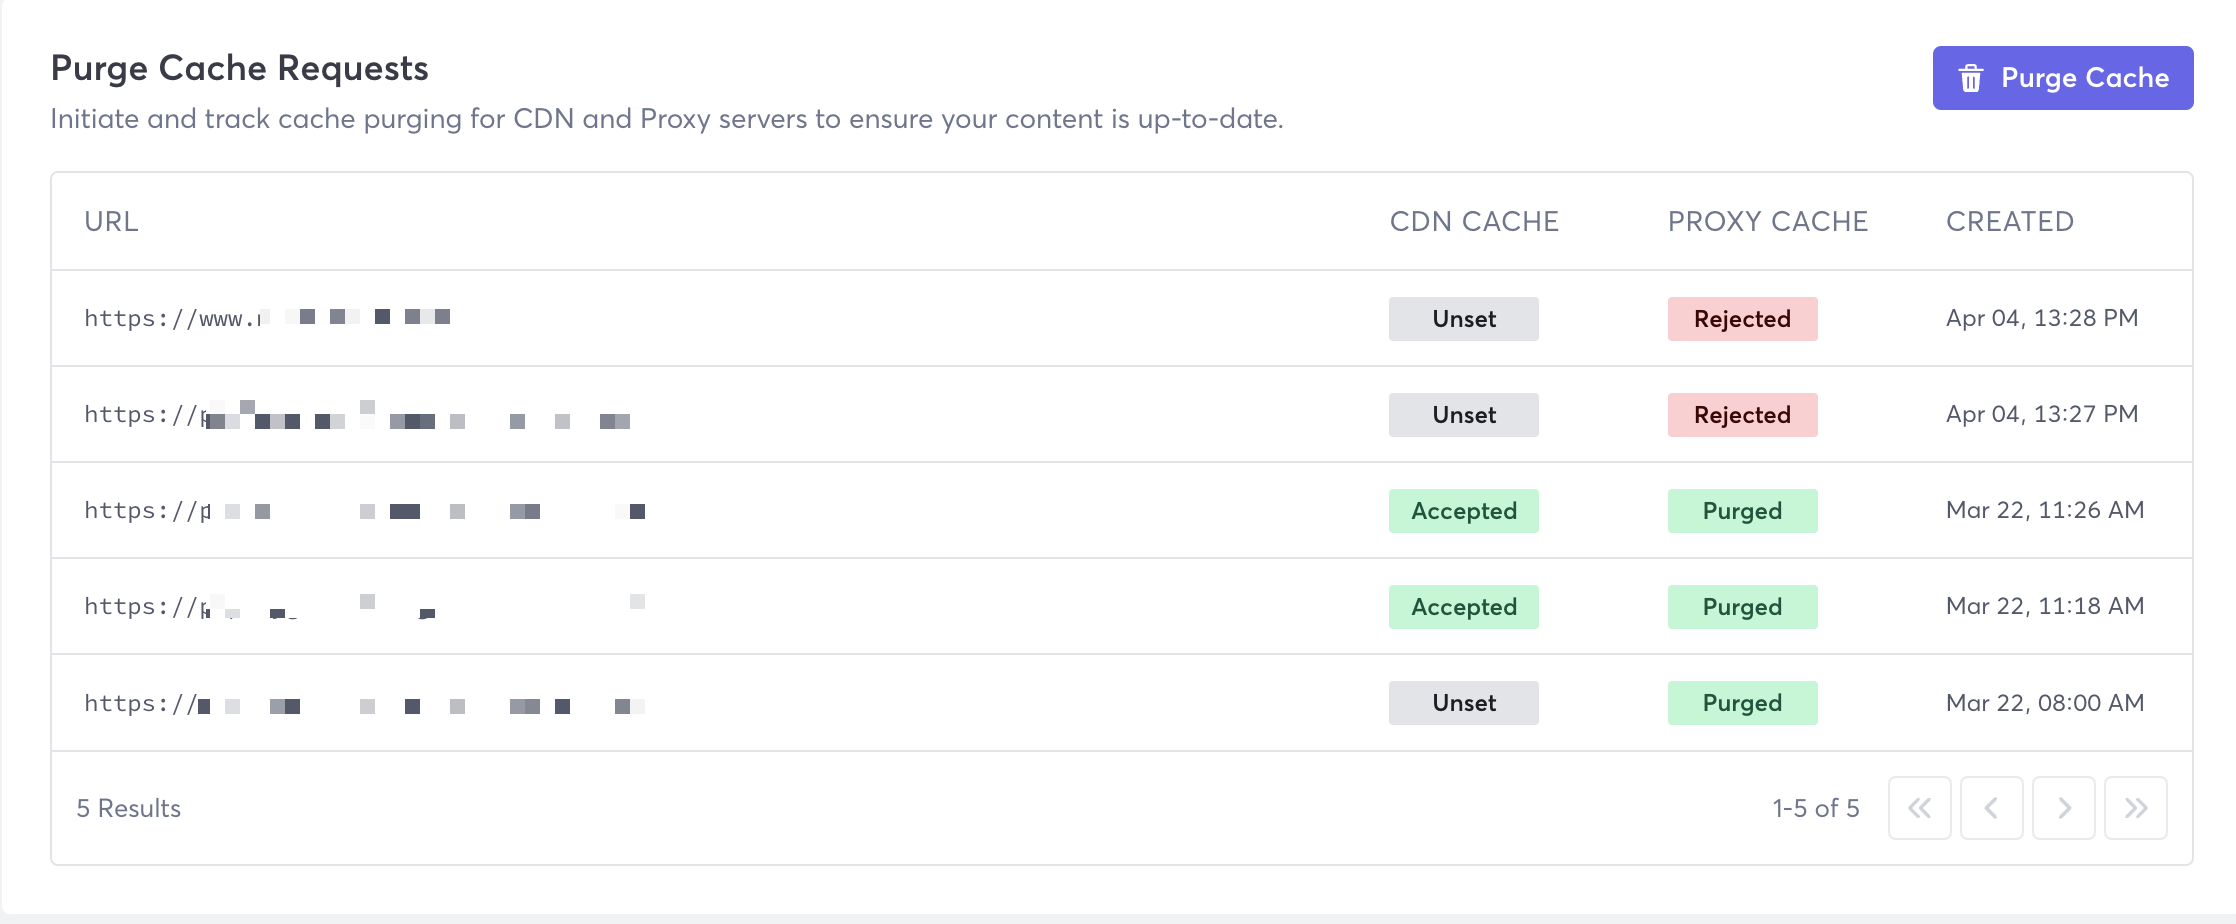
View Purge Cache Requests
Perform the following steps to view P3 cache purge requests:
Log in to your PhotonIQ Performance Proxy dashboard.
Click Cache.
The Purge Cache Requests table provides the following fields:
- URL - The URL of the cache being purged.
- CDN Cache - Status of the CDN cache purge. Options are:
- Accepted - The cache purge request was accepted.
- Unset - The request did not include a CDN cache purge.
- Proxy Cache - Status of the P3 cache purge. Options are:
- Purged - Cache has been successfully purged.
- Rejected - Cache request was rejected.
- Created - Date and time the request was entered.
Purge the Cache
Perform the following steps to purge your P3 cache:
- Log in to your PhotonIQ Performance Proxy dashboard.
- Click Cache.
- Click Purge Cache.
- Click Add and then enter the URL, including
https://, that you want to purge the cache for. Click Add and then repeat this step for each URL you want to include in the purge request. - (Optional) If you want to purge your CDN cache as well, then click the Yes, I want to purge CDN cache too. checkbox.
- If purging the CDN, then click the arrow to expand the CDN Purge Params and then enter information in the fields. For more information about these fields, refer to Akamai's Welcome to Purge Cache.
- Click Submit.